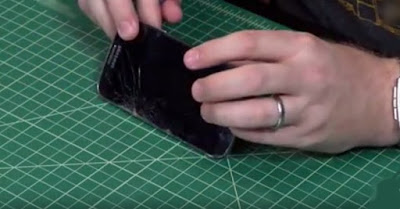
Are you one of those people who think 'our mobile phones and
tablets come with Gorilla glass! It's
okay if we drop them'. Yeah ... see now that kind of attitude is probably why
you're reading this post in the first place. Mobile phones and tablets are
increasingly sturdy; but let's face it that's no excuse for you to take them
lightly. Many a times our care free outlook results in a broken or cracked
mobile or tablet screen. Fret not! what's done is in the past, let us equip you
with a DIY (do-it-yourself) remedy for broken screens on phones as well as laptops because both
have similar over all structures.
Before proceeding, you should know exactly how to go about it. It should know the procedure and have the ability to disassemble and assemble cell phones and tablets easily. If not, you have the option to get cell phone repair training at Prizm Institute, which conducts this course through self-study and online training for people who cannot attend school.
You can also the mobile repairing course in hindi at Prizm Institute Mumbai if you know only Hindi language. This mobile repairing course is conducted in Mumbai city in Maharashtra state.
You can also the mobile repairing course in hindi at Prizm Institute Mumbai if you know only Hindi language. This mobile repairing course is conducted in Mumbai city in Maharashtra state.
Before you begin, look up your device's fifteen-digit IMEI
(International Mobile Equipment Identification) by looking inside the battery
where it is written or by using *#06# to retrieve it. Once located; identify
the part number of your device's screen via an online search engine and order
it via a trusted website such as eBay or Amazon, etc. Once your new screen
arrives begin dissecting!You can read our earlier post of cell phone repair book which covers many skills needed to learn to be an expert cell phone repair technician.
You can go through a lot of YouTube videos to understand the entire procedure in a better way. Here is a good video https://www.youtube.com/watch?v=iS9YYUfBHwE
#2 Removing The Old Screen:
- Caution: This part isn't for the faint hearted; you need precision, patience and nerves of steel.
- Make a plain surface by taping down cartridge paper Then, remove the back cover and battery.
- Loosen any cabling that is now visible such as the camera cable for example.
- If clasps are exposed; remove their associated cables.
- Unscrew the back frame that contains the motherboard from the chassis containing the LCD. Gently separate the two.
- Either mark the removed screws or place them in distinct containers for easy identification.
- Remove any cable assemblies that may have become visible.
- Then, unscrew the LCD-containing chassis from the front frame. Store these screws in another container for easy identification.
- To remove the broken screen; wave the heat gun over the adhesive join and pull them apart. Be sure to wear protective for this part
#3 Placing New Screen:
- Place new two-sided tape on the areas of the front frame that have lost it's stickiness. Be sure to not let the tape overlap with the screen.
- Reattach any seals or foam padding.
- Thread the digitizer cable and place the new glass to the front frame by pressing it down.
- Use canned air to remove any dirt from the screen.
- Reattach the camera and any other parts that were removed in the order that you recall.
- Don't worry if glitches appear in the first assembly, this happens, just trace you're steps back to identify and rectify them.
You can save a lot of money by replacing the screen yourself. At the same time, it can cost you a lot more if you break or mess with any part of the phone. So be careful
Tips:
- Be sure not to touch the inner side of the glass as it will leave marks that won't go away easily.
- Do not place the memory card, processor or motherboard on metallic surfaces.
- You may need to use a heat gun to reattached tape-styled cables that were attached to frames.
There you go; your DIY hack to replacing a broken screen. If you are not comfortable in performing the above methods, its better to let a cell phone repair technician to handle the job. You may make things difficult if you misdo any step or get stuck in the middle of the process!
So did you succeed in replacing the screen? Do let us know in the comments below.

No comments:
Post a Comment
Note: Only a member of this blog may post a comment.